Friday, January 13, 2017

CADWorx Basic - Setup

On your desktop, open "CADWorx Plant Professional 2017".


At the launch page you can select an existing file from "Recent Documents" or start a new drawing by left-clicking the "+" tab to the right of the "Start" tab.


By selecting the "+" tab, you will create a new document that automatically loads a preset template file. With the new document started, go ahead an take the time to save it. 

Select the "CADWorx Plant I" tab in the ribbon. Notice at the top I have my own work space settings loaded (J-MATT). I would recommend you having your own as well. Let me know if you need help with that.


Then select the "Setup" Icon in the top left portion of the panel.


In the resulting dialog box, select the "Load" button, bottom right, to load the CADWorx configuration file. This file contains all the paths needed to correctly load the catalogs. It must be loaded first before you can load the catalog.


Navigate to the location of your CADWorx Specification files. (Altura Designers, please see my Slack post showing where our files are located.)


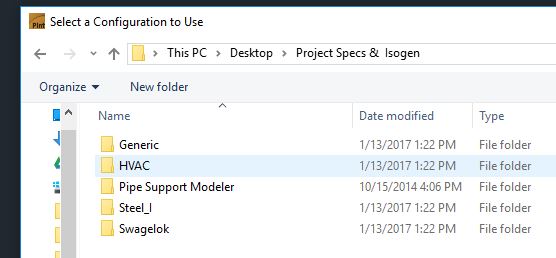
Each folder contains the catalog information for each company. Select the company you are working for then select the .CFG file found in that folder, then select "Open".


At the "Plant Setup" dialog select the "Apply and Close" button near the bottom.


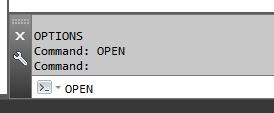
Remember, this loaded the configuration file only, which has all the proper paths the menu needs to function. Next you will load the menu. If your "SPEC View" Palette is not open already, type "SPECVIEW" into the command line. In the top left corner of the palette, select the "Set Specification and Size" icon.


In the resulting dialog box, select the "Browse" button near the top. It will open at the proper location, because that location was set by the configuration file you loaded earlier. Select the .PRJ file and select "Open".


Wait a few moments for the information to load. You can then select the Specification, Main Size, and the Reducing Size you need, then select "OK". Note, you will need to select these in order for the catalog to load.


Your SPEC View Palette is now populated with the catalog information.


Please ask if you have questions regarding this walk through.

Be helpful.
-Jeremy


Tuesday, October 25, 2016

From Model to Iso - PSV

The goal in the design group is to have complete and accurate models, full of all the correct information. This is a walk through to obtain that goal when designing PSV setups. Start with your designed setup, which has all the line numbers correctly applied. Double-click on the PSV component. (Click on pictures to enlarge, then the Back button to return)


Go to the "TAG" entry line and enter the correct information. Notice in the example, the "$" was used. This forces all text following after to enter on a second line.


From here, select the "ISOGEN" button at the bottom left of the dialog box.


At the top right of the "ISOGEN" dialog box, click the pull-down menu labeled "TYPE" under the "MESSAGE" section, and select "CIRCLE".


This will create a circle on the Isometric. Next enter the information you want to see in the circle in the "TEXT" entry line.


Notice the "$" symbol to force a second line. Now your PSV model component holds all the information, which will automatically transfer over to the isometric, saving you a few "scrub" items.


Please ask if you have any questions regarding this walk through.

Be helpful.
- Jeremy


Thursday, October 13, 2016

Quick Shortcuts


In this work, "clicks" means "ticks"...on the clock. The fewer "clicks" it takes to navigate to a file location, the fewer "ticks" are used. Here is a quick way to navigate to project files that you frequently. While in AutoCAD (CADWorx), type "OPEN" in the command line.


This brings up the obvious Open Dialog box, prompting you to select the file you wish to open. Typically one would spend countless seconds, or "ticks" clicking through the maze of file trees, hoping to stumble across the file they wish,yet fretful they might find themselves lost...


On the left side of this dialog there are a list of "Quick" Shortcuts. You can remove unwanted ones by right-clicking on each one and selecting remove:


You can also add frequent locations with "ADD". This selection will prompt you to enter the file location and name the "Quick" Shortcut folder. You will need to copy the address from a File Explorer address bar and paste it in the "Item Path" bar.


Or if you managed to maneuver your way to a frequent location in the browse window, choose the "Add Current Folder" Option. You can right-click on any of the "Quick" Shortcut thumbnails, choose properties and change the name. These changes will hold in any File Open dialog box prompted by AutoCAD (CADWorx). You can do the same in other program File Open dialog boxes as well.

One last tip, the same application can apply to the Quick Access section of your File Explorer. Remove the unused items, and insert your most frequent used items.


Clicks = Ticks
Be Helpful


Wednesday, October 12, 2016

Single Display Interface...or SDI

Do you ever weary from swapping through multiple drawing tabs in AutoCAD, while trying to check an isometric with the model it was generated from?


You can open two (or more...way more) sessions of AutoCAD (CADWorx) and have the model open on one monitor, and the isometric on a second monitor. This allows you a side by side visual and functional comparison between the two DWG files.


To accomplish this, open one drawing in AutoCAD (CADWorx) and type the command -SDI-, set the value to 1. This forces the program to open a new session with every drawing, instead of tabbing multiple drawings in one session.

A few things to note, if you try to open a drawing with a file already open, you will be prompted to save, as it will close your current drawing to open another. To have multiple sessions, simply right-click on your AutoCAD (CADWorx) desktop icon, and select 'RUN'.

Be Helpful